Outstanding customer service. Call or email us anytime. We'd love to hear from you.
The My Squirrel Guard fastener is designed for simple installation of a solar protection barrier against birds and small animals. Our squirrel guard wire is the perfect complement to our fasteners. Installed correctly, it will provide years of protection and will not void your solar panel warranty. It is simple and easy to install and can be completed in a few hours.
Step 1:
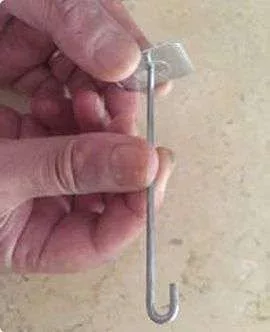
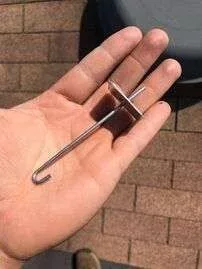
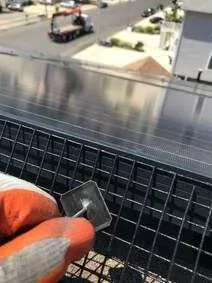
The first step in installation is to assemble the two parts of the fastener. Insert the straight portion of the hook into the hole in the washer. The silver side of the washer should be inserted first. The silver side should face the J (bent) portion of the hook. Insert the washer straight without wiggling it too much as this could damage the washer and reduce it ability to firmly grip the hook.
We recommend preparing the washers on the ground before you get onto the roof as you will find it easier to work on the ground. This will also prevent the loss of hooks and washers on the roof. We recommend preparing at least 75 washers for every 100 feet of wire or 40 washers for every 50 feet of wire you intend to install while on the roof. You will find that this will save you time and effort in the entire installation process.
Step 2:
Insert the washer about an inch through the hook as this will provide sufficient wire to grip with a pair of pliers later in the installation process.
Step 3:
Once on the roof, check under the solar panels for birds, squirrels and other small animals. Remove any nest from below the panel/s by lifting the panel/s where the nests are and removing any nests, babies, eggs, etc. Be sure to clean up any debris prior to beginning.
Now that you have cleaned up any nests, you are ready to begin. Unwind the roll of wire. In order to make the installation simpler, you may prefer to cut the wire to a length you are comfortable working with. We recommend not trying to work with more than 20 feet of wire if this is your first time installing a squirrel guard. You can always work with smaller sections of wire if you find that easier.
Step 4:
Next, bend the wire in order to create an L-shape. We suggest holding the wire adjacent to the panel and using the panel edge in order to assist with the bending. Most solar panels have an aluminum frame that should not be damaged. Be careful not to put too much pressure in bending the wire. We recommend bending the wire as close to 90 degrees as possible to get as close to an L-shape as possible.
Step 5:
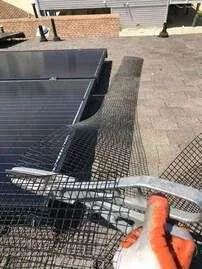
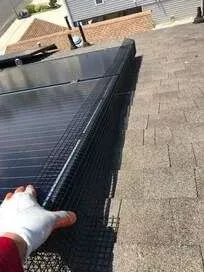
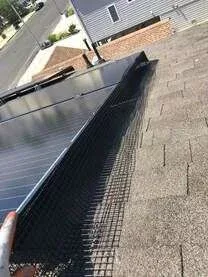
Once the wire has been bent, you are ready to begin the installation of the pest abatement system. Place your bent wire flush against the panels. We recommend keeping the excess wire outside, and not under the panels. This will make it more difficult especially for squirrels to push against the wire if the L were placed below the panels. A bird or animal would need to push against their own body weight making it virtually impossible to push the wire and enter under the panels.
Step 6:
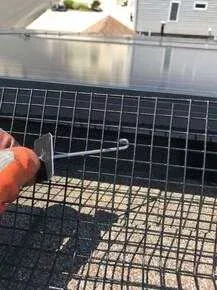
Take one of your prepared fasteners (hook and washer) and insert it through an opening in the wire mesh closest to the bottom edge of the solar panel frame. The black side of the washer should be facing you. Be sure to apply slight downward pressure to ensure that the wire mesh is not higher than the frame.
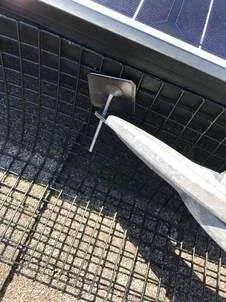
Step 7:
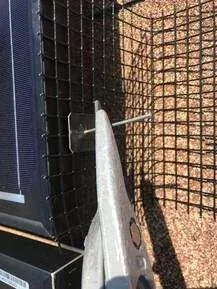
Hook the J loop to the lip of the solar panel frame. Once the hook has caught the loop, grab the hook with your pliers (recommended) with one hand and push the washer in towards the wire until it is firm and flush against the wire mesh.
Step 8:
Make sure the washer is flush and tight against the mesh. You can now cut off the excess hook wire with your pliers or bend it downwards. Bending is easier and will not leave pieces of of the hook that you now need to clean off your roof.
Step 9:
Repeat steps 5-8 for the rest of your solar system. Make sure that the next section of wire being installed is flush against the earlier section that you just installed. For added protection, you could even overlap the screen (wire) a couple of inches as this will not affect performance. It is critical that you do not leave any gaps between one section of screen and another. We have seen squirrels and a few sparrows get into gaps as small as 1 1/2 – 2 inches.
Caution must be taken to ensure that the screen is below the top edge if the panel as this will reduce the possibility of the guard being ripped off by snow land sliding off the panels. Also, it looks better if you cannot see the screen jutting out above the panels.
Several installers (including us), prefer to install the guard with the excess wire laying on the roof outside the panel perimeter as opposed to under the panels. We find this easier to install and more secure. For additional information on this install, please see our installation gallery.